Length: 14–26 mm, Number of sizes: 4, Material: brass, 75 pcs/pack, Price per pack
● In stock
from 31,33 € / pack
Prices include 21% VAT. More about VAT and customs fees.
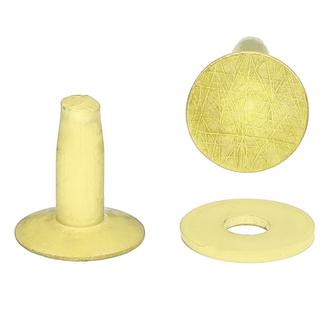
Length: 14–26 mm, Number of sizes: 4, Material: brass, 75 pcs/pack, Price per pack
● In stock
from 31,33 € / pack
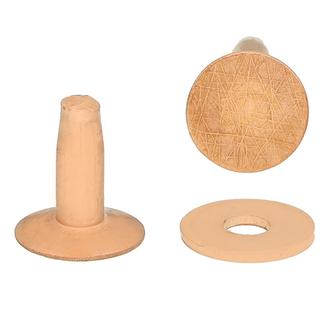
Length: 14–26 mm, Number of sizes: 6, Material: copper, 100 pcs/pack, Price per pack
● In stock
from 19,72 € / pack
Snappy advises
Copper and brass rivets and burrs have a solid shank that, once peened over the burr, holds tighter than two-part single cap and double cap rivets with their hollow post. Use them on joints that take a pull: collars, leads, harnesses, belts and bag handles. They also suit thick leather stacks, where the two halves of a two-part rivet no longer lock together. Copper has a warm, reddish tone; brass matches brass hardware.
Guides & articles
Rivets & Burrs: jump straight to what you need.
Rivets & Burrs: want to choose your own way? Set up a filter exactly to your needs.
Rivets & Burrs: what the parameters mean and how to choose the right values.
Rivets & Burrs: Pavla's hands-on view – what caught her attention and what to watch out for when making and choosing.

I treat rivets and burrs as a rivet type of their own, not as a variant of standard open saddlery rivets, because they are set differently. First I fit the burr onto the shank and drive it down to the material with the setter. Then I snip off the excess shank with end cutters. You'll find a step-by-step guide with photos in the article How to attach copper rivets.
Above the burr I leave roughly 2–4 mm of shank, depending on the rivet size. Around 2 mm is enough for smaller rivets; on larger ones I leave more, so there is enough material for the new head. I cut in two steps: first about halfway through the shank, then I turn the cutters 90° and finish the cut. The resulting bevel is easier to tap down and shape with the setter.

Rivets & Burrs: most common questions – materials, selection and practical tips.
By the total thickness of all the layers you're joining. Once the rivet is through the material, leave at least 5 mm between the top layer and the point where the shank starts to taper, so there's room for the burr and for setting.
A longer shank is fine: you snip off the excess once the burr is seated. That's why you don't choose the length the way you would for standard saddlery rivets. The shank length is listed for every rivet in the dimensions table as dimension B.
Nothing serious. Once the burr is seated, snip off the excess with end cutters.
Leave 2–4 mm of shank above the burr, depending on the rivet size. Around 2 mm is enough for smaller rivets; leave a bit more on larger ones so you can form the new head.
Cut in two steps. First cut about halfway through the shank, turn the cutters 90° and finish the cut. This leaves a bevel that's easy to tap down.
You won't be able to set the rivet. If there isn't enough shank left once the burr is on, you can't form the new head. Pick a longer rivet for that material thickness.
Push the rivet through the prepared hole and fit the burr onto the shank from the other side.
Drive the burr down to the material with the setter, using several lighter blows.
Trim the shank with end cutters so that 2–4 mm remain above the burr.
Form the head. Tap the bevelled end down with a hammer and finish it with the setter's cup. Run a finger over the finished rivet: no sharp edge should remain.
You'll find the step-by-step photos in the guide How to attach copper rivets.
A rivet and burr has a long shank and a separate burr. You fit the burr onto the shank, snip off the excess and form the second head from what's left.
A standard saddlery rivet (single cap or double cap) has two parts that fit together when the rivet is set. So the two types differ in construction, in how you set them and in how you choose the length.
Match it to the shank diameter and make it with a hole punch of the same size. The rivet has to pass through the material but mustn't wobble in the hole. The shank diameter is listed for every rivet in the dimensions table as dimension A.
The shank won't pass through a hole that's too small, or you'll damage the material. In a hole that's too big, the rivet won't sit firmly and the joint may not hold.
Besides the rivets and burrs, have these ready:
a hole punch or punch pliers for the hole,
a rivet and burr setter; for copper rivets we stock a copper rivet setter,
a hammer,
end cutters to trim the shank,
a solid work surface, such as a small anvil or a granite slab.
Copper and brass react naturally with their surroundings, darken and develop a patina. It's not a defect, it's how these metals behave.
Moisture and water speed this up. Long exposure to damp gives copper its typical blue-green patina; brass turns darker and duller.
Cleaning and polishing bring the shine back; for brass you can use Sitol. To keep the rivets shiny longer, keep the item dry and wipe it down after it gets wet.
 Hardware, leather and tools under one roof. Fewer gaps on the shelf, more time at the bench.
 37 years in business, 101,767 customers and more lessons than fit in a catalog.
 Choose the quantity first. We show pack and carton prices, plus any order-value discount, before checkout.